Pinhole Passion: My 110 Pinhole Camera
9 25 Share TweetTo celebrate this year’s World Pinhole Photography Day, I’ve been making pinhole cameras in all the film formats I’m familiar with: 35mm, 120, instant film, and now…110!
Since Lomography brought back 110 film, I’ve been thinking about making a 110 pinhole camera. I was pretty worried that, with such a tiny format, the pictures’ quality would not be outstanding, but hey, we’re plastic-lens-lovers, aren’t we? So nevermind quality and let’s have some crafty fun!

So, here’s how I made my baby pinhole camera.
All you need is: a 110 film cartridge, a not-so-big piece of cardboard, a pencil, a ruler, a little piece of tin (you can cut it out off any can), a pin, black/dark electrical tape and scissors (and maybe a cutter or an x-acto knife)…nothing fancy, as you can see!
First things first: let’s take a look at the anatomy of 110 film.
Here we can see the top and back sides of the cartridge, where the film counter is…

…While here’s the front/bottom sides with the film and the advance wheel.

Once we’ll be taping our cartridge to make it light-proof, the only two things we will never ever cover with tape are the exposure counter and this tiny little wheel here, which is the only way we have to advance film.

Now, the first thing I did was measuring the distance between the two bumps on the front of the cartridge.

Then, I measured both the height and depth of the cartridge and cut a small rectangle out of my piece cardboard, tracing on it the outline of both the top and the bottom of the cartridge.

Next, I traced the diagonals in the part corresponding to the front and drew a small rectangle there too, which I then cut out: here’s where the little piece of tin foil will be, i.e. here’s where the pinhole will be.


After taping my tin foil bit on the back of my cardboard “camera body,” I marked its diagonals too and, using a pin, I pierced a hole in the center of it.

Now, I was ready to tape the cardboard to the cartridge. As I was using some recycled cardboard, I taped it with some washy tape. If you wish to do the same, be careful: you will either avoid covering the piece of tin foil, or you’ll have to pierce a hole through the tape (like I did) for the pinhole. Also, remember not to cover the back of the cartridge (where the exposure counter is) and the advancing wheel on the bottom.


Everything is now in place, so it’s time to make sure the pinhole camera is truly light-proof. I know Lomographers LOVE light leaks, but when it comes to pinhole cameras, light leaking in means best case scenario, über-exposed pictures, or, mostly, burnt pictures.
I don’t know what’s going on ‘round here, but I went to three different hardware stores and couldn’t find black electrical tape, so I bought three rolls of blue tape and used two layers.
Anyway, here’s the mummy/pinhole camera, 100% light-proof (except for the pinhole, of course).

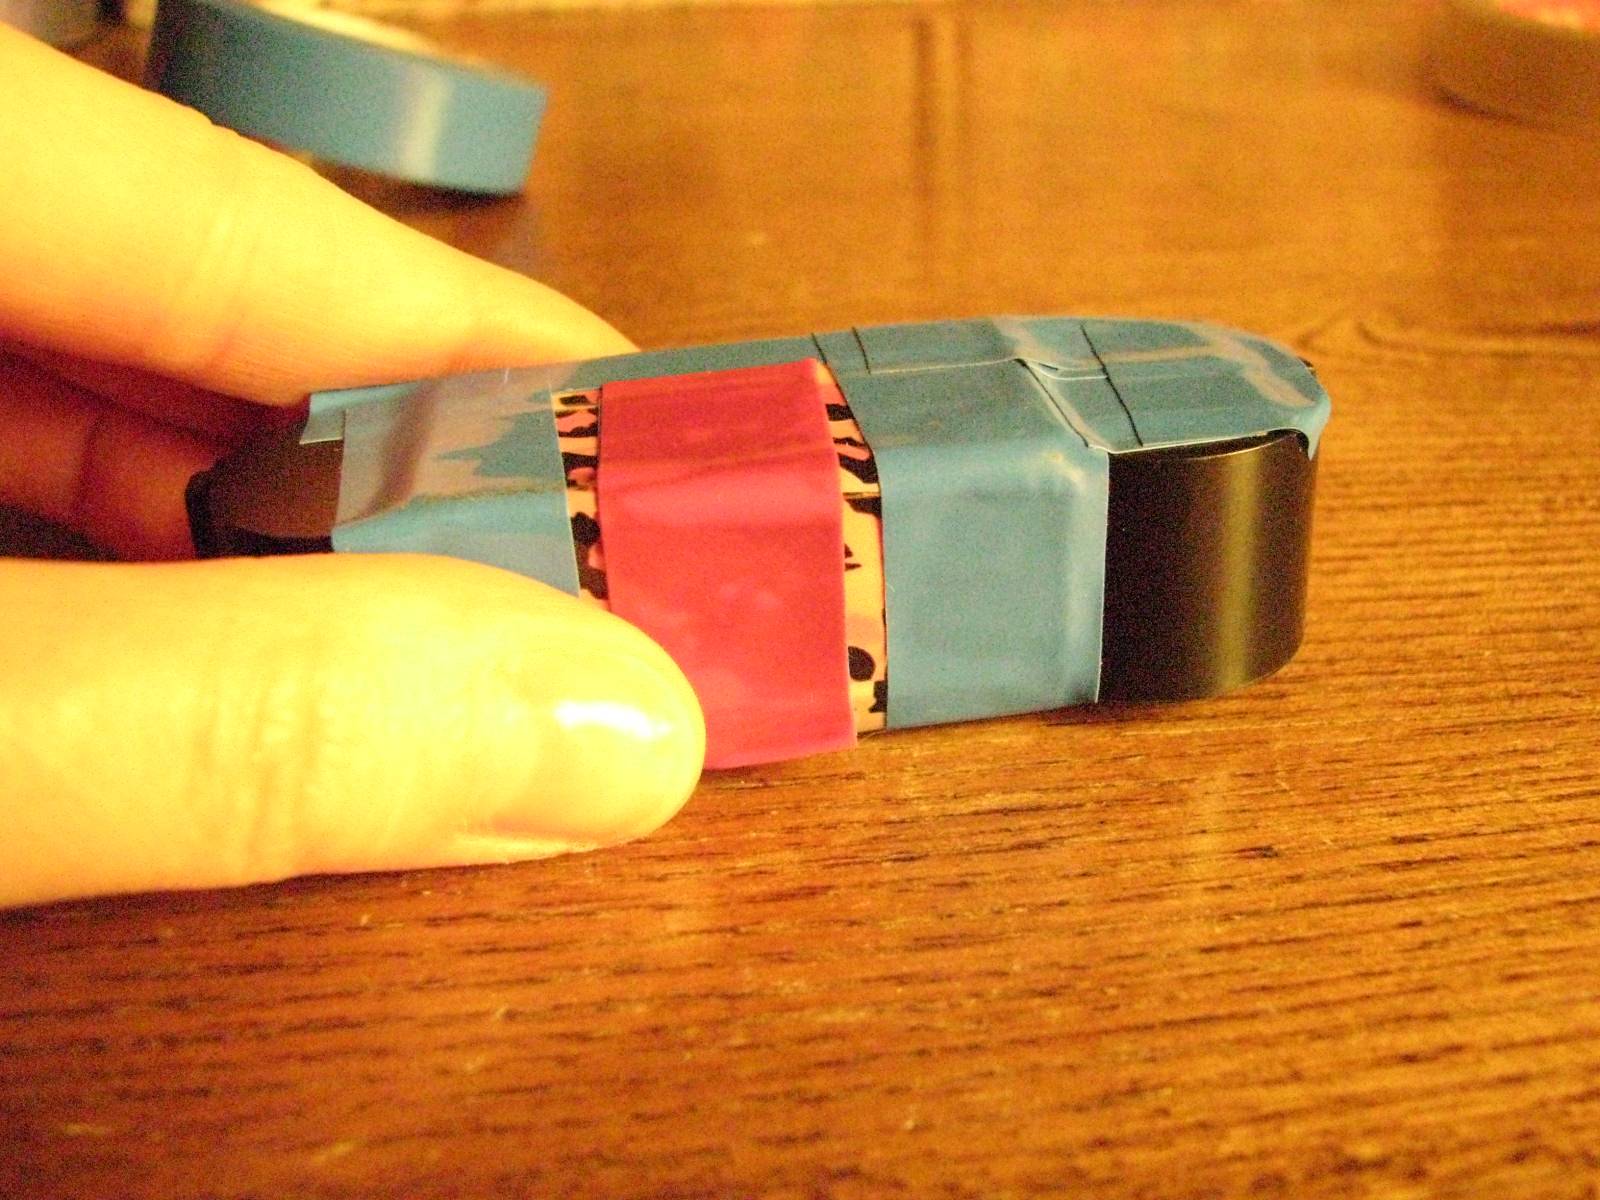
Last but not least, the shutter. Mine is really simple: just take a piece of black tape and stick it on the pinhole. (I folded the last bit of it on itself so that it doesn’t stick to the “camera” and it’s easier to lift). I used blue tape and covered it with red tape just because. Do not use red tape only as the light would definitely leak in.

Lift it up to take a picture…

Stick it back to close the shutter.
Turn the advance wheel counter-clockwise to go to the next frame. It was a bit stiff at the beginning so I had to use my car keys to move it, then it became smoother, so don’t worry if it seems to be stuck, just force it a bit and it will work.
I absolutely love the exposure counter on the back: it makes 110 pinhole cameras much more convenient than those in the 35mm format!


I’ve built this camera for World Pinhole Photography Day, which is on April 28th, so I haven’t tested it yet, but in case you want to build a pinhole camera and need an exposure guide, I’d recommend the one that comes with the Diana Multi Pinhole Operator. If you use Lomography Color Tiger film like I did, remember that it is an ISO 200 film.

I will share my results (or whine about my epic failure) on my blog; feel free to come take a look and have fun creating your own 110 pinhole camera!
Editor’s Note: Dear bunnyears, don’t forget to tell us about your pinhole experiment as well!
escrito por bunnyears el 2013-04-24 #equipo #tutoriales #pinhole #pinhole-photography #110 #110-film #tipster #pinhole-camera #pinhole-masters-and-magic #pinhole-tipster #pinhole-passion #110-pinhole


9 Comentarios