DIY Film Retriever/Extractor
20 60 Share TweetI have always experienced problems when it comes to making sure that I don't fully rewind my 35 mm film. Tips such as folding a kink and sensing the changes in tension during rewinding might work for most of you, but for a beginner like myself, is very difficult. So today, I'm going to share with you a simple technique that my friend recently taught me how to pull the film out after you have fully rewound the film.
Materials
So, first things first, you will need:
- A pair of scissors
- Double sided tape
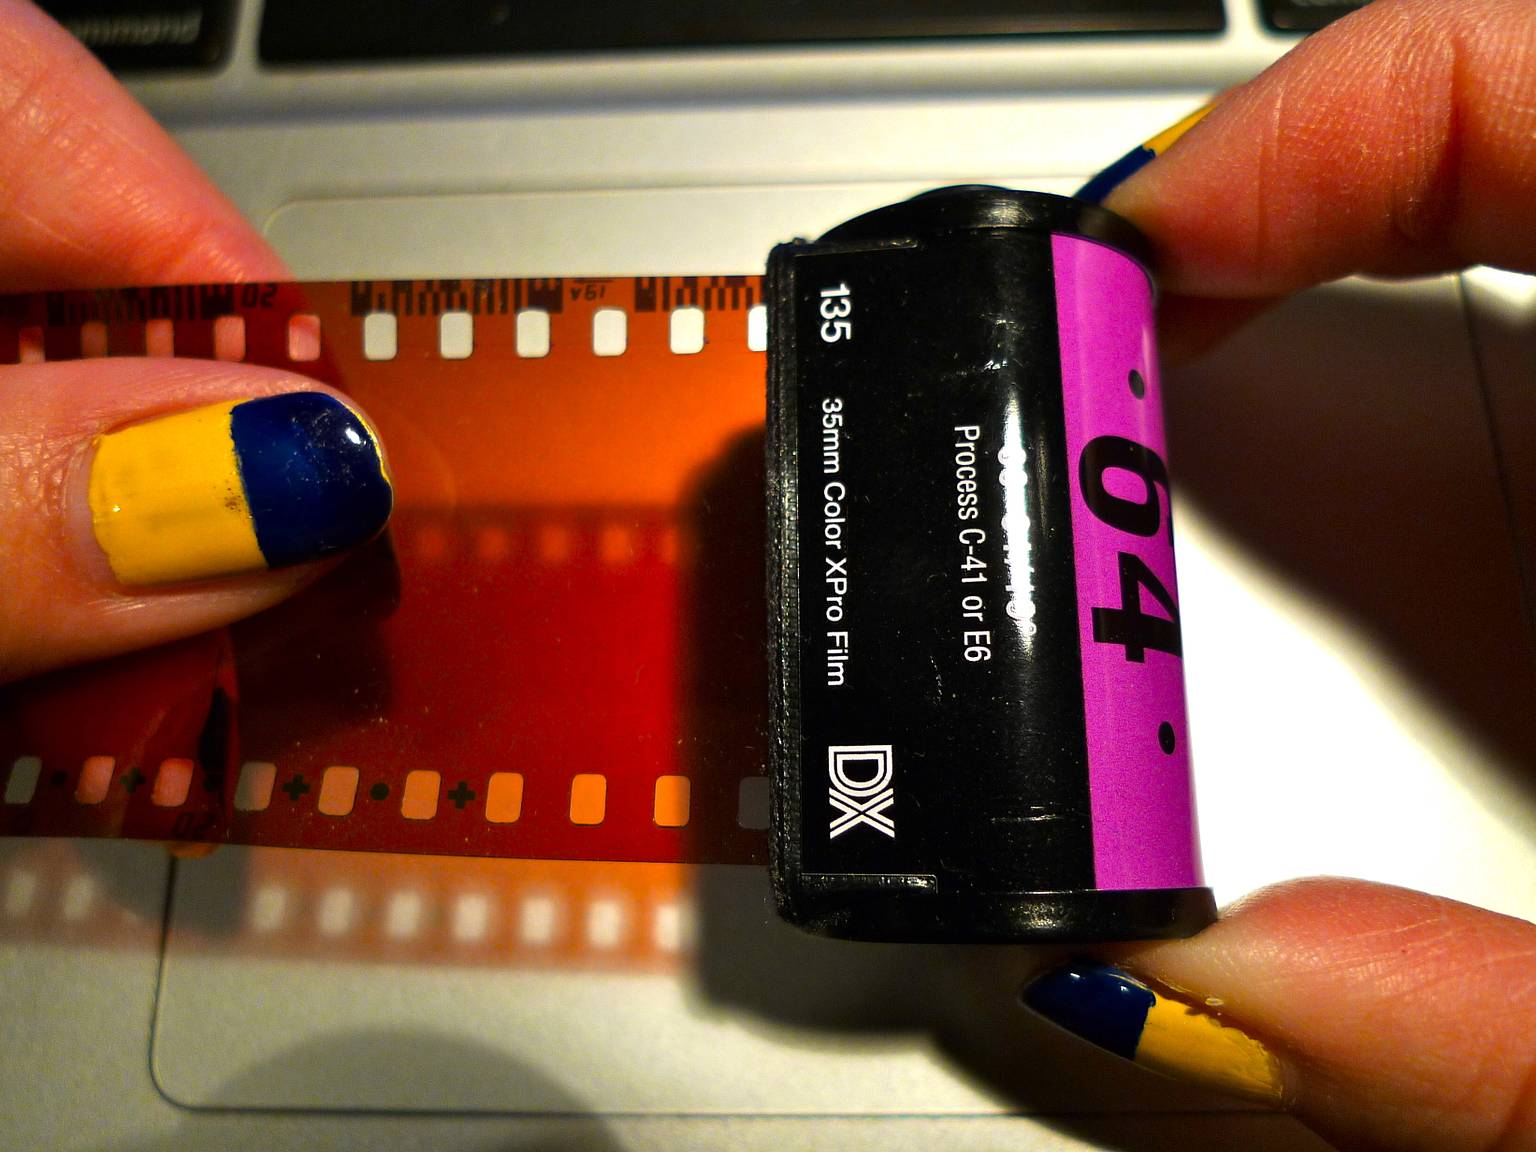
- A section of 35 mm negative, and
- A roll of film that has a fully retracted film leader

Steps
Step One: With your pair of scissors, cut a section of double sided tape and stick it on the tip of the negative. Peel the backing so that the sticky side is exposed.
Step Two: Then, insert the negative into the roll of film, making sure that the sticky side is FACING DOWN. Try to push in at least one inch.
Step Three: Turn the small knob on top of the roll until it starts to pull on the section of negative. By doing this, you are causing the roll of film to come into contact with the double-sided tape.
Step Four: Once you feel that the tape is stuck on, slowly pull out the section of negative. You should be able to see the film leader.


Then, voila! The good thing about this technique is that you don't need to buy a film retriever/extractor and it can be done in broad daylight without affecting the film. This would also be useful for people that develop their own film!

Now, you are ready to do some film swap or double exposures!
This article was written by Community member amytam.
escrito por amytam el 2012-06-29 #equipo #tutoriales #film #diy #film-swap #tip #tutorial #tipster #lomography #quick-tipster #film-retriever #film-extractor


20 Comentarios